Why Adjust the Roller Gap on a Flour Mill Machine?

Time:2026-09-22 Author:Amelia
0%

Adjusting the roller gap is one of the most important tasks when operating a flour mill machine. This small distance controls how firmly the rollers grip and crush the grain. A gap that is too wide may leave coarse particles and reduce extraction efficiency. A gap that is too narrow can generate excess heat, increase power consumption, and damage the rollers. The flour may also become uneven.

In practice, the correct setting depends on grain moisture, kernel hardness, roller speed, and the desired flour texture. Operators should learn how to adjust the roller gap on a flour mill machine by following the manufacturer’s manual and checking both roller sides carefully. A feeler gauge can help confirm a more consistent distance. However, numbers alone are not enough. A small test batch often reveals problems that measurements miss.

Watch the flour closely.

Fine flour should feel soft, not warm or greasy. Bran pieces should separate clearly when the milling process requires it. After each adjustment, inspect the flour, listen for unusual vibration, and check whether the motor is working harder. Experienced millers usually change the gap gradually, then record the result for future batches. This habit improves repeatability and reduces guesswork.

Still, no setting works perfectly for every grain. Moisture can change during storage, and roller surfaces may wear unevenly. That is why careful observation remains essential. A reliable adjustment combines technical guidance, clean equipment, safe operating practices, and honest evaluation of the finished flour.
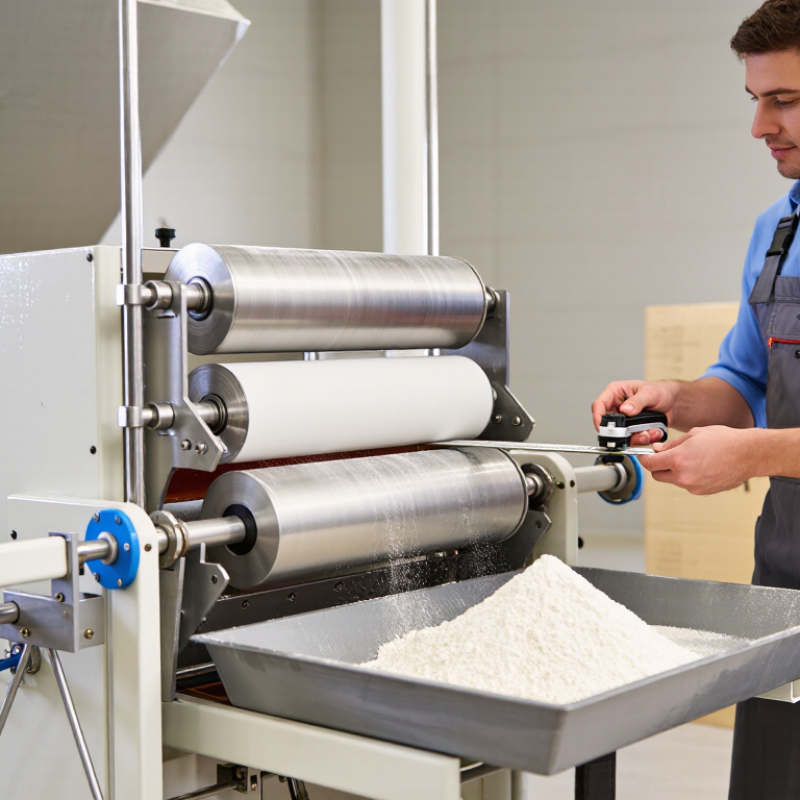
Why Adjust the Roller Gap on a Flour Mill Machine?

Understanding the Roller Gap in a Flour Mill Machine

The roller gap is the space between two rotating rolls inside a flour mill machine. It controls how strongly the grain is crushed. A narrow gap produces finer particles, while a wider gap allows larger fragments to pass through.

In practical milling, I check the gap before changing the feed rate. A feeler gauge helps confirm the setting more reliably than visual judgment. The rolls should remain parallel from one side to the other. Even a small difference can create uneven flour, excess bran fragments, or unnecessary heat. That matters.

The correct gap depends on grain moisture, hardness, roll surface, and the desired flour grade. Dry grain may break too aggressively under a tight setting. Moist grain can smear and clog the working area. I usually make small adjustments, then inspect the flour texture and sieve results. Never change too much at once. I still find this step easy to rush, especially when production pressure rises. That is where mistakes begin. A useful record should include the gap, grain condition, feed rate, and flour yield. These notes make later adjustments more consistent, although they cannot replace direct inspection. Experienced operators also listen for unusual vibration and watch for rising product temperature. Both signs may indicate excessive pressure or poor alignment.

Why Adjust the Roller Gap on a Flour Mill Machine?

The roller gap controls how aggressively wheat kernels are reduced. In this typical reference range, a narrower gap produces finer flour and higher extraction in a single pass, but it can also increase starch damage and heat generation. A wider gap reduces grinding intensity and may require additional passages to reach the target flour fineness. Actual results depend on wheat hardness, moisture, roller speed, and mill design.

How Roller Gap Affects Flour Milling Performance

Why Adjust the Roller Gap on a Flour Mill Machine?

How Roller Gap Affects Flour Milling Performance

The roller gap controls how strongly wheat kernels are reduced during milling. This setting affects flour particle size, extraction rate, energy use, and product consistency. A wider gap may leave larger particles and require extra passes. A narrower gap creates finer flour, but it can increase heat, power consumption, and starch damage.

Small changes matter.

During routine milling, I check the flour texture after each pass. Flour should look even, feel smooth, and contain limited coarse fragments. If the rolls press too tightly, the machine may vibrate or produce warm flour. Heat can rise quickly. That matters. Excessive heat may weaken quality, especially when the grain is already dry.

Moisture also changes the correct setting. Dry kernels can break aggressively, while properly conditioned wheat may need a gentler first pass. Operators should adjust the gap gradually and observe throughput rather than relying only on a fixed measurement. A feeler gauge can help, but it cannot replace checking the actual flour.

The first setting is rarely perfect.

In practice, a slight adjustment may improve flow without changing the recipe. However, tightening the gap too soon can overload the rolls and create uneven reduction. I have seen operators focus on finer flour while overlooking reduced capacity. That is a useful warning. Record the gap, feed rate, grain condition, and flour temperature during each trial. These details make later decisions more reliable and expose process problems that a single measurement may hide.

When to Adjust the Roller Gap

Why Adjust the Roller Gap on a Flour Mill Machine?

Adjust the roller gap when flour quality changes, not simply by following a calendar. The best timing depends on grain moisture, roller wear, feed rate, and the desired flour texture. A fine flour with excessive heat may indicate a gap that is too narrow. The rollers may be working too hard. If whole kernels or large particles remain after milling, the gap may be too wide.

Check the gap during initial setup, after cleaning, and whenever grain conditions change. Test a small sample before running a full batch. Squeeze the flour between your fingers and inspect the particle size under good light. Listen for unusual vibration or a harsh grinding sound. A sudden increase in motor load also deserves attention. Stop the machine before opening any guarded area.

In my experience, small adjustments work better than dramatic changes. Turn the setting slightly, then mill another sample. Record the result, even if it seems obvious. I have sometimes blamed the roller gap too quickly. Uneven feeding, a blocked screen, or damp grain can create similar symptoms. That mistake wastes time. Keep the rollers clean and check their alignment regularly. If one side produces coarser flour, the gap may not be even across the working width. Safety comes first. Never adjust exposed rollers while they are moving.

Steps for Adjusting the Roller Gap Safely

Why Adjust the Roller Gap on a Flour Mill Machine?

Safe roller-gap adjustment starts with control, not speed. A narrow gap produces finer flour, but it can increase heat, power demand, and roll wear. A wider gap may leave coarse particles and reduce milling consistency. USDA WASDE reports place recent global wheat production above 800 million metric tons, so small efficiency gains matter across large-scale operations. Yet every wheat type needs a different setting.

Stop the feed and isolate the machine before touching the rolls. Apply lockout and tagout procedures. Verify zero energy by testing the control panel, then check that the rolls cannot rotate. OSHA identifies grain dust as a fire and explosion hazard in handling facilities. Clean nearby dust before adjustment. Remove loose tools, inspect guards, and examine the roll surfaces for scoring or trapped bran.

Use a calibrated feeler gauge at both roll ends. Adjust each side in small, equal movements. Never force one side down. Rotate the rolls by hand only after confirming isolation. I still recheck the gap twice; uneven settings are easy to miss. Restore guards, remove tools, and test the mill empty. Then introduce a small feed sample and measure flour texture, temperature, and bran separation. Record the setting and product result.

Tips: Keep the gauge clean. Follow the machine manual. Do not guess the gap. Recheck after vibration, roll replacement, or a change in wheat moisture. The NFPA 61 standard also supports dust-control practices around grain-processing equipment.

Why Adjust the Roller Gap on a Flour Mill Machine? - Steps for Adjusting the Roller Gap Safely
Step Purpose Typical Gap or Check Value Safe Adjustment Procedure Verification Method Safety Requirement
1. Stop and isolate the mill Prevent roller movement while the gap is being inspected or changed. 0 rpm before access Switch off the mill, isolate the electrical supply, apply lockout/tagout where required, and wait until all rollers have stopped. Confirm that the drive, feeder, and rollers cannot start unexpectedly. Never place hands or tools near the rollers while the machine is energized.
2. Clean the roller surfaces Remove flour, bran, and compacted material that can produce a false gap reading. No visible buildup Use the cleaning method specified for the machine. Do not use compressed air around unprotected bearings or electrical components. Inspect both roller faces and the side plates under good lighting. Wear eye protection and a suitable dust mask when cleaning flour deposits.
3. Inspect alignment and wear Ensure that the rollers are parallel and that worn surfaces are not mistaken for an incorrect setting. Uniform contact across roller width Check adjustment screws, locking nuts, bearings, scrapers, and guards for looseness or damage. Compare the gap at the left, center, and right sides using a feeler gauge or the machine’s approved gauge. Do not operate the mill with missing guards, damaged bearings, or loose fasteners.
4. Select a starting gap Match the opening to the milling passage and the desired particle size. Break passage: 0.60–1.20 mm
Reduction passage: 0.20–0.60 mm
Use these as general starting ranges only. Follow the equipment manual and adjust for grain hardness, moisture, roller diameter, and product specification. Record the selected setting in the operating log before restarting. A smaller gap increases shear and power demand; never reduce the gap below the machine’s specified minimum.
5. Adjust both sides evenly Maintain parallel rollers and prevent uneven loading or localized wear. Left-to-right difference: ideally ≤ 0.05 mm Loosen the locking mechanism, turn the adjustment controls in small equal increments, and measure both sides after each change. Check the gap at three positions across the roller width before tightening the locks. Keep hands, clothing, and tools outside the nip point; use approved tools only.
6. Secure the setting Prevent vibration from changing the roller position during operation. Locking hardware fully tightened Tighten the lock nuts, clamps, or handwheels according to the machine’s specified procedure. Do not overtighten adjustment components. Recheck the gap after locking because the setting can shift slightly. Replace damaged locking hardware before returning the machine to service.
7. Perform a controlled test run Confirm stable operation before introducing a full grain feed. No abnormal noise, vibration, or rubbing Install all guards, start the mill empty, and allow it to reach normal operating speed before feeding a small test quantity. Observe motor load, noise, vibration, product flow, and roller temperature. Stop immediately if the rollers stall, contact each other, or produce unusual noise.
8. Evaluate the milled product Determine whether the gap produces the required break, particle size, and flour release. Adjust in 0.05–0.10 mm increments If the product is too coarse, reduce the gap slightly. If excessive heat, smearing, high fines, or motor overload occurs, increase the gap and investigate feed conditions. Compare sieve results, flour temperature, throughput, and motor load with the process target. Make one change at a time and stop the mill before any manual adjustment.
9. Document the final setting Improve repeatability between batches and shifts. Record in millimeters Log grain type, moisture, passage, roller gap, throughput, motor load, product temperature, and operator observations. Review the record when product quality or energy consumption changes. Keep maintenance and operating records available to trained personnel.
Important: Roller-gap values are general operating references, not universal machine settings. Always confirm the permitted range, adjustment sequence, guarding requirements, and lockout procedure in the specific mill’s technical documentation.

Checking Flour Quality After Gap Adjustment

Why Adjust the Roller Gap on a Flour Mill Machine?

Checking Flour Quality After Gap Adjustment

After adjusting the roller gap, flour quality should be checked immediately. A narrower gap often produces finer flour, but excessive pressure may increase heat and damage its baking performance. I usually collect samples from the beginning, middle, and end of production. This reveals whether the mill maintains consistent results.

A simple sieve test helps confirm particle size. Fine flour should pass smoothly, while larger particles may indicate an uneven gap or poor feeding. I also inspect the flour by hand. It should feel soft, dry, and reasonably uniform. Look for bran flakes, dark specks, or a warm, stale smell. These details matter. A first adjustment is rarely perfect. In practice, small changes can affect moisture distribution and dough absorption. Recording the gap, product temperature, sieve result, and milling speed improves repeatability. Laboratory testing can also check moisture, ash, and protein when strict quality control is required.

Tips: Let the machine run briefly before collecting samples. Use clean containers and label each sample clearly. Compare results with an approved reference sample. If flour feels unusually warm, stop and investigate. Recheck the gap after cleaning, because trapped particles can change the setting. Safety guards should remain in place during operation.

FAQS

What is the roller gap in a flour mill machine?

The roller gap is the space between two rotating rolls. A narrow gap creates finer particles. A wider gap leaves larger fragments. Small changes matter.

How does the roller gap affect flour quality?

It influences particle size, extraction rate, energy use, and consistency. A gap that is too narrow may produce warm flour and excess starch damage. A gap that is too wide may leave coarse particles.

How can operators check the roller gap accurately?

Use a feeler gauge instead of relying only on sight. Confirm that the rolls remain parallel across their full width. Visual judgment can mislead.

When should the roller gap be adjusted?

Check it during initial setup, after cleaning, and when grain conditions change. Adjust it when flour becomes too coarse, too fine, or unusually warm. The calendar is not enough.

How do grain moisture and hardness change the correct setting?

Dry grain can break too aggressively under a tight gap. Moist grain may smear and clog the working area. Hard grain may need a different setting from softer grain.

What signs suggest that the roller gap is too narrow?

Warm flour, strong vibration, harsh grinding sounds, or increased motor load may appear. The rolls may be working too hard. Not always, though. Uneven feeding can cause similar symptoms.

What signs suggest that the roller gap is too wide?

Whole kernels or large particles may remain after milling. Flour may feel coarse between your fingers. A second pass might become necessary, reducing capacity.

How should an operator adjust the roller gap safely?

Make a small adjustment, then mill and inspect a sample. Check texture, sieve results, temperature, and throughput. Stop the machine before opening guarded areas. Never adjust exposed moving rolls.

What information should be recorded during roller-gap trials?

Record the gap, feed rate, grain condition, flour temperature, and yield. Include the sample’s texture and sieve result. These notes improve repeatability, but direct inspection still matters.

Can every flour problem be solved by changing the roller gap?

No. A blocked screen, uneven feeding, damp grain, or poor alignment may create similar results. I have blamed the gap too quickly before. That mistake wastes time.

Conclusion

The roller gap in a flour mill machine is the space between two rollers, and it plays a major role in controlling how grain is crushed and refined. A correctly set gap helps produce consistent flour, improves milling efficiency, and reduces unnecessary heat, dust, and roller wear. A wider gap may be suitable for the initial breaking stage, while a narrower gap can help achieve finer flour during later passes. The gap may need adjustment when grain moisture changes, flour becomes too coarse or too fine, production output drops, or the machine produces unusual noise or vibration.

To understand how to adjust the roller gap on a flour mill machine, first switch off and safely isolate the equipment, then clean the roller area and check the adjustment mechanism. Make small, even changes on both sides to keep the rollers parallel, and avoid forcing the controls. After restarting, inspect the flour’s texture, color, particle size, and temperature. If necessary, make another gradual adjustment until the desired flour quality and stable machine performance are achieved.

Amelia

Amelia

Amelia is a seasoned marketing professional with a wealth of expertise in our company’s core offerings. With an unwavering passion for driving growth and innovation, she plays a pivotal role in shaping our marketing strategies and enhancing brand visibility. A key aspect of her responsibilities......