How to Temper Wheat Before Milling for Better Flour

Time:2026-09-27 Author:Mason
0%

Tempering may look like a small step: water is sprayed onto wheat, then the kernels rest in a tempering bin. Yet this quiet interval helps determine how cleanly bran separates from the endosperm—and how much flour a mill can recover. Why do you need to temper wheat before milling? Because dry kernels can shatter, sending more bran fragments into the flour, while properly conditioned kernels are generally easier to separate and grind.

The exact moisture target and resting time depend on wheat class, kernel hardness, starting moisture, and mill design. Industry guidance commonly describes conditioning wheat to roughly 14–16% moisture, with resting times that may range from several hours to a day or more. These are working ranges, not universal settings. U.S. Wheat Associates’ technical materials emphasize testing wheat and flour properties; millers should likewise check incoming moisture and verify results on their own equipment. A damp surface alone proves little.

Milling scientist R. Carl Hoseney, author of Principles of Cereal Science and Technology, is often cited for explaining how grain structure and processing affect flour quality. Rather than assign him an unverified direct quotation, this introduction draws on that established principle: conditioning changes how the kernel behaves during milling. The practical test is visible in the break rolls, bran flakes, and flour analysis. Temper too little, and separation may suffer. Temper too much, and the process can become harder to control. Real wheat is variable. That detail matters.
How to Temper Wheat Before Milling for Better Flour

Understanding Wheat Tempering and Its Purpose

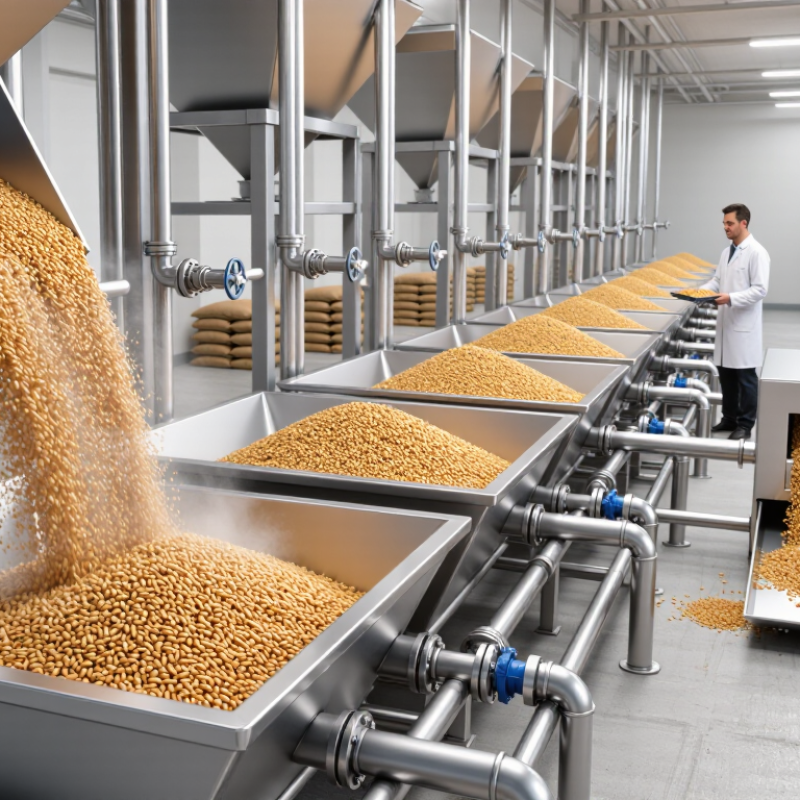
Wheat tempering is the controlled addition of water to grain before milling. The water moves through each kernel during a resting period, changing how its parts behave under the rollers or stones. The goal is not simply to make wheat damp. It is to prepare the bran and endosperm for cleaner separation.

A properly tempered kernel often has a tougher, more flexible outer layer and a softer inner endosperm. This can help reduce bran breaking into tiny flakes that mix into the flour. It may also support more consistent milling and sifting. Small changes matter. A dusty handful of grain and a kernel with a slightly conditioned surface can mill quite differently.

The required water and resting time depend on wheat variety, initial moisture, kernel size, and milling setup. Millers commonly measure grain and water by weight, then mix thoroughly so moisture is not concentrated in a few spots. The kernels should rest in a covered container to limit drying. Check them by feel: they should not look wet or stick together. There is no universal setting. Even experienced millers may need to adjust after a change in harvest or storage conditions, and the result may still be imperfect.

Assessing Grain Moisture and Initial Condition

Before tempering, test a representative wheat sample rather than trusting the delivery ticket. Moisture can vary across a truckload, especially when kernels come from different fields or harvest conditions. The Canadian Grain Commission’s annual Harvest Survey reports crop quality measures, including moisture and protein, across multiple wheat classes. That kind of lot-level variation matters: a single reading may hide wetter pockets that soften quickly during conditioning.

Use a calibrated moisture meter, then confirm questionable readings with a recognized oven-drying method, such as AACC International Method 44-15.02. Record the wheat’s temperature, moisture, kernel hardness, and visible damage. Look closely for shriveled kernels, sprouting, insect damage, and excess chaff. Small details count. Many milling references place conditioned wheat in a broad range near 14–16% moisture, but the suitable target depends on wheat class, mill settings, and resting time. Treat that range as a starting point, not a recipe. A warm sample can also distort meter readings, so let it reach room temperature before testing. I have found that rushed sampling causes more trouble than complicated adjustments; still, sampling technique is easy to overlook. If the lot is uneven, test separate portions before choosing a tempering target.

Cleaning Wheat Before Adding Water

Before adding water, clean the wheat thoroughly. Tempering works best when moisture reaches sound kernels, not dust, chaff, or loose debris. Spread a small sample on a light-colored tray and look for straw, weed seeds, cracked grains, and stones. The small pieces matter. They can affect milling and may damage equipment.

Use a screen or sieve to separate material by size, then use an appropriate grain cleaner to remove lighter chaff. A magnet can help catch stray ferrous metal, but it cannot replace careful inspection. Keep the grain dry during cleaning, and avoid soaking it at this stage. If the wheat has an unusual odor, visible mold, or signs of insects, set it aside for assessment rather than blending it into a clean batch.

No single cleaning step catches everything. That is easy to forget when a batch looks uniform. Check the wheat again after cleaning, especially around the bottom of bins and at transfer points where debris can settle. Clean equipment between lots to limit carryover. Once the kernels are free of visible impurities, measure the grain and add water evenly according to the target moisture level and wheat condition. A few kernels may still escape notice; inspect, adjust, and record what worked for the next batch.

Calculating and Applying the Required Water

How to Temper Wheat Before Milling for Better Flour

Calculating water accurately starts with measuring the wheat’s current moisture, not guessing from its feel. Use this formula: water to add (kg) = grain weight × (target moisture − current moisture) ÷ (100 − target moisture). Moisture values are percentages on a wet basis. For 100 kg of wheat at 12% moisture, raising it to 16% requires about 4.76 kg of water. FAO grain-handling guidance emphasizes moisture measurement because uneven or excessive moisture can compromise storage and processing. A calibrated meter helps; record the reading, target, and water added for each batch. Small errors add up.

Tips: Apply water in a fine spray while mixing the grain. Let it rest in a covered bin, then check moisture again before milling. Tempering time varies with wheat hardness and kernel size; hard wheat often needs longer than soft wheat. A practical starting point is 12–24 hours, but verify the mill’s process requirements. Kernels should feel evenly conditioned, not wet on the surface. Real batches can be stubborn. Recheck before milling, especially when incoming wheat moisture varies.

How to Temper Wheat Before Milling for Better Flour - Calculating and Applying the Required Water
Example wheat condition Starting moisture
(wet basis)
Target moisture
(wet basis)
Wheat weight Water to add Practical application note
Wheat starting at 12.0% 12.0% 15.0% 1,000 kg 35.3 kg (about 35.3 L) Add evenly while mixing; allow moisture to distribute before milling.
Wheat starting at 13.0% 13.0% 16.0% 1,000 kg 35.7 kg (about 35.7 L) Check the wheat’s measured moisture first; do not rely on a nominal harvest value.
Wheat starting at 11.0% 11.0% 14.5% 1,000 kg 40.9 kg (about 40.9 L) Use a fine, uniform spray and mix thoroughly to reduce wet and dry spots.
Wheat starting at 12.5% 12.5% 16.0% 1,000 kg 41.7 kg (about 41.7 L) After conditioning, recheck moisture and adjust the milling schedule as needed.
Calculation: Water to add (kg) = wheat weight (kg) × (target moisture % − starting moisture %) ÷ (100 − target moisture %). Moisture percentages must be on a wet basis. Water volume in liters is approximately equal to water weight in kilograms at ordinary processing temperatures.
Example: For 1,000 kg of wheat at 12.0% moisture targeting 15.0%: 1,000 × (15 − 12) ÷ (100 − 15) = 35.3 kg of water.
Note: Target moisture and conditioning time depend on wheat type, mill settings, and process conditions. Treat these figures as calculation examples; verify the target for the specific wheat and milling process.

Resting and Checking Wheat Before Milling

Tempering is not just adding water and waiting. It gives moisture time to move through each kernel, firming the bran while conditioning the starchy interior. Weigh the wheat before adding measured water; guessing often leaves some kernels dry and others too damp. Mix thoroughly, then seal the grain in a clean food-safe container to limit moisture loss.

Let it rest according to the wheat’s hardness, starting moisture, and room conditions. A few hours may not be enough for hard kernels; many millers allow an overnight rest, then check before milling. Cut or crack several kernels. The bran should bend or separate more cleanly, while the center should feel firm, not soft or sticky. Check more than one handful. Uneven mixing can hide dry pockets.

Use your senses, but don’t rely on them alone. A musty smell, condensation, or visible damp clumps calls for caution; do not mill questionable grain. Keep notes on grain weight, added water, room temperature, and resting time. I have found that a simple record helps, though my first timing estimate was often wrong. Adjust gradually next time, and keep the grain covered until it reaches the mill.

Typical Wheat Tempering Moisture Targets

Target moisture varies with wheat type, initial moisture, and the milling process.

These values are representative targets, not universal specifications. Measure the wheat’s starting moisture, add water gradually, mix thoroughly, and allow enough resting time for moisture to distribute through the kernels. Check moisture again before milling and adjust to suit the grain and mill.

FAQS

Why is wheat tempered before milling?

Water conditions each kernel before milling. The bran becomes tougher, while the inner endosperm softens. This can help separate them more cleanly.

How should I measure the water?

Weigh the wheat and water instead of guessing. Mix thoroughly so moisture does not collect in a few spots.

How long should wheat rest?

Resting time depends on wheat hardness, starting moisture, and room conditions. Some millers allow an overnight rest. A few hours may not be enough for hard kernels.

How can I tell if the grain is ready?

Crack several kernels from different handfuls. The bran should bend or separate cleanly, and the center should feel firm, not sticky.

Should tempered wheat look wet?

No. Kernels should not look wet or stick together. Keep them covered in a clean, food-safe container while they rest.

What if the grain smells musty or has damp clumps?

Treat musty smells, condensation, or visible damp clumps as warning signs. Do not mill questionable grain. Better to pause.

Why check more than one handful?

Mixing may leave dry pockets or uneven moisture. Several samples can reveal differences that one handful misses.

What should I record for next time?

Note the wheat weight, added water, room temperature, and resting time. Records help guide adjustments, though timing can still be wrong. I still misjudge it sometimes.

Conclusion

Wheat tempering is the controlled process of adding water to clean grain and allowing it to rest before milling. The main goal is to improve the balance between the bran, germ, and endosperm so they separate more cleanly during grinding. If you wonder, “why do you need to temper wheat before milling,” the answer is that proper moisture conditioning can reduce bran breakage, improve flour consistency, and make the endosperm easier to release.

Before tempering, assess the wheat’s moisture level, temperature, cleanliness, and overall condition. Remove dust, stones, and other foreign material so the added water can be absorbed evenly. Calculate the required water according to the grain’s starting moisture and the desired final level, then apply it gradually while mixing thoroughly. Afterward, allow the wheat to rest for an appropriate period so moisture can move toward the center of each kernel. Before milling, check that the grain feels evenly conditioned rather than wet on the surface or dry inside.

Mason

Mason

Mason is a seasoned marketing professional with a deep expertise in the company's offerings and a passion for driving brand awareness. With a strong background in digital marketing strategies, he has an innate ability to connect with diverse audiences and effectively communicate product benefits.......