A mechanical flour sifter can fail without warning, disrupting production and leaving uneven flour in every batch. The problem may appear simple, yet several causes can hide beneath the screen, frame, or drive system. This guide explains how to troubleshoot a mechanical flour sifter failure through practical inspection and controlled testing.
Begin by observing the symptoms carefully. Is the sifter vibrating weakly, stopping suddenly, or producing coarse particles? Check the power supply, emergency stop, motor noise, belt tension, and unusual heat. Look for flour buildup around the mesh and inspect loose fasteners near the shaking mechanism. Small details matter. A thin layer of compacted flour can reduce screening efficiency before the machine stops completely.
Reliable troubleshooting requires more than replacing parts. Follow the manufacturer’s manual, isolate power before opening guards, and record each inspection result. A qualified maintenance technician should confirm electrical faults, bearing damage, or structural cracks. Do not rely on sound alone; a quiet motor may still have a failed capacitor or overloaded drive. I have seen operators blame the mesh too quickly, while the real issue was uneven loading. That assumption deserves reconsideration. Testing one variable at a time provides clearer evidence and prevents unnecessary repairs. Clean tools, accurate measurements, and documented maintenance history also improve the final diagnosis. Some failures remain uncertain until the machine runs under normal load. That is acceptable. Careful verification is better than confident guesswork.
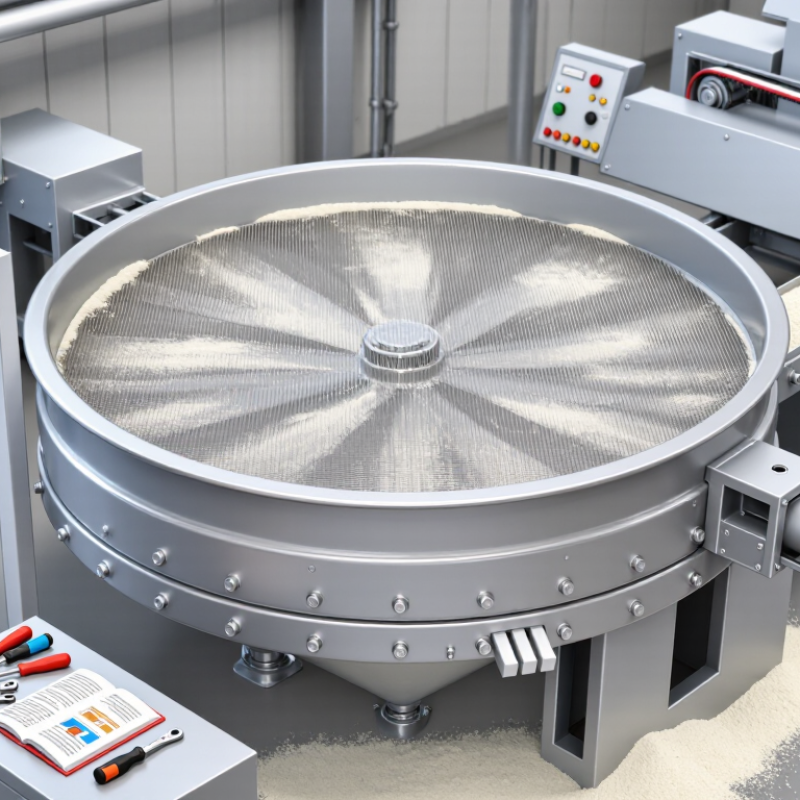
A mechanical flour sifter rarely fails without warning. Uneven flour flow often appears first. You may notice coarse particles passing through the screen or fine flour collecting unevenly. Reduced output can indicate a blocked mesh, excessive moisture, or incorrect screen tension. Sharp rattling usually suggests a loose fastener, damaged bearing, or misaligned drive assembly. Touch the housing carefully after shutdown. Unusual heat near the motor or bearing deserves attention.
Begin with a controlled inspection and follow the equipment manual. Disconnect power before opening guards or removing the screen. Check for compacted flour around the mesh, worn seals, and cracked frame joints. Rotate the shaft by hand if the design permits. It should move smoothly, without grinding or side movement. Measure belt tension rather than relying on feel. A loose belt slips; an overly tight belt can overload bearings. In my maintenance experience, small alignment errors often create large vibration problems.
Inspect eccentric weights and mounting bolts closely. Their position affects screening motion and product quality. Confirm that the screen is seated evenly on every side. A damaged mesh may look acceptable but still reduce separation accuracy. Moist flour can harden inside hidden corners. That detail is easy to miss. Record vibration, temperature, throughput, and noise before changing several parts. Otherwise, the real cause becomes difficult to prove. Sometimes, the first diagnosis is wrong. Recheck the evidence.
2026 How to Troubleshoot a Mechanical Flour Sifter Failure?
Checking Power, Drive Components, and Safety Mechanisms
When a mechanical flour sifter stops, begin at the power source rather than the screen. Confirm the disconnect is on, then inspect the cable, plug, and control panel for heat marks or loose terminals. A qualified technician should verify voltage with an approved meter. Never rely on sound alone. A motor may hum while receiving insufficient power.
Next, examine the drive system with the machine isolated. Check belts for glazing, cracking, or slackness. Inspect couplings, bearings, eccentric weights, and shaft alignment. Flour dust can hide early wear around housings. Rotate the shaft manually, if the equipment procedure permits. Rough movement often indicates contamination, bearing damage, or a seized component. My early inspections sometimes focused on broken belts and missed a loose coupling. That mistake wasted time.
Safety mechanisms deserve equal attention. Test guard switches, emergency stops, lid sensors, and overload protection according to the service instructions. Do not bridge or defeat an interlock to force operation. The sifter may start unexpectedly and create serious mechanical hazards. Reset an overload only after finding the cause. Excessive load, blocked mesh, or poor lubrication can trigger repeated trips. A no-load test can mislead you. Recheck performance with a controlled flour charge, watching vibration, noise, and throughput. Record each finding, because small changes often reveal a developing failure.
Use these reference checks to isolate faults in the power supply, drive components, and safety mechanisms. Always confirm the final limits against the motor nameplate, equipment manual, and site safety procedures.
Reading guide: A 230 V supply should remain within the applicable ±10% range, motor current should not exceed the nameplate full-load current, vibration should remain below the selected machine alarm limit, and an open guard circuit should remove the run command.
2026 How to Troubleshoot a Mechanical Flour Sifter Failure?
Inspecting screens, sieves, bearings, and internal clearances starts with a stopped, isolated machine. Check the screen under bright light. A torn mesh, stretched wire, or flour-packed opening can reduce throughput quickly. Measure the screen opening against the equipment specification. Do not trust appearance alone. In practice, operators sometimes replace a screen before checking tension. That wastes time.
Inspect sieve frames for dents and uneven seating. A small gap can let flour bypass the screening surface. Rotate the shaft by hand and listen for roughness. Check bearing housing temperature, grease condition, and visible dust ingress. According to a 2023 Plant Engineering maintenance survey, reactive work still represents roughly one-third of maintenance activity in many facilities. That pattern encourages rushed bearing replacement. It also hides alignment problems.
Measure shaft runout and internal clearance with calibrated instruments. Excess clearance may create vibration, while insufficient clearance can cause heat buildup. ISO 20816 guidance supports trending vibration rather than relying on one reading. Record the baseline after cleaning. Review changes after several production cycles. I have seen a quiet bearing fail soon after inspection because the coupling was misaligned. The screen was blamed first. It was not the real fault. Check fasteners, seals, and shaft alignment before restarting, then document the measured values, not just “passed.”
| Failure Symptom | Component or Area to Inspect | Inspection Method | Typical Acceptance Guideline | Common Finding | Corrective Action | Post-Repair Verification |
|---|---|---|---|---|---|---|
| Reduced flour throughput or frequent product backup | Screen surface, feed inlet, discharge outlet | Stop and isolate the sifter. Remove the screen and inspect for flour buildup, blocked openings, and foreign material. | Screen openings should be open, evenly tensioned, and free from hardened flour or contamination. | Blinded mesh caused by moisture, fat, or compacted flour. | Clean with an approved dry method or replace damaged mesh. Correct upstream moisture or temperature problems. | Run a controlled feed test and confirm stable flow without accumulation at the inlet. |
| Oversize particles appearing in the sifted flour | Screen cloth, frame, clamps, and seals | Inspect the full screen under good lighting. Check for tears, loose edges, open seams, and gaps around the frame. | No visible tears, open seams, or bypass gaps; mesh size must match the process specification. | Torn mesh or flour bypassing around an improperly seated screen. | Replace the screen assembly or reseat and tighten the clamps. Replace compressed or cracked gaskets. | Collect a representative sample and verify particle separation using the plant’s sieve test method. |
| Excessive vibration or movement of the machine | Drive weights, shaft, housing, support springs, and fasteners | Check fastener tightness, inspect the shaft for runout, and compare the drive-weight position with the maintenance setting. | No loose structural fasteners; shaft runout and drive settings should remain within the equipment maintenance specification. | Loose counterweight, worn support spring, bent shaft, or unbalanced rotating assembly. | Tighten or replace hardware, renew damaged springs, and balance or replace the rotating assembly. | Operate empty first, then under normal load; confirm vibration returns to the site baseline. |
| Grinding, rumbling, or knocking noise | Bearings, bearing housings, shaft, and coupling | Listen during operation, check bearing temperature, and inspect for looseness after lockout. Use vibration monitoring where available. | Temperature should remain stable and close to the established machine baseline; no abnormal play or rough rotation. | Insufficient or contaminated lubricant, worn bearing, misalignment, or a damaged bearing seat. | Relubricate only with the specified food-grade lubricant and quantity, or replace the bearing and correct alignment. | Record temperature and vibration during a loaded trial and compare readings with historical baseline values. |
| Bearing housing becomes unusually hot | Bearing lubrication, seals, alignment, and shaft load | Measure temperature at the same location each time and inspect lubricant condition and seal contact. | Temperature should not show a continuing rise or exceed the bearing and lubricant manufacturer’s service limit. | Overgreasing, grease incompatibility, excessive belt or coupling load, or seal friction. | Remove excess lubricant, use the approved lubricant, correct alignment, and replace defective seals or bearings. | Monitor temperature through a complete operating cycle and document the stabilized value. |
| Uneven separation between coarse and fine fractions | Screen tension, screen orientation, internal deck, and product distribution | Check tension across the screen, inspect deck surfaces, and observe whether product is distributed evenly across the mesh. | Screen should be flat and evenly tensioned; product should not concentrate in one area during operation. | Slack screen, incorrect installation, blocked deck, or uneven feed distribution. | Retension or replace the screen, install it correctly, clean the deck, and adjust the feed arrangement. | Compare samples from each discharge stream and confirm consistent results across repeated tests. |
| Flour leakage around access covers or discharge points | Gaskets, clamps, cover joints, flexible connectors, and internal pressure points | Inspect seals for cuts, compression set, flour tracks, and incorrect seating. Check that clamps close evenly. | Continuous, clean contact around the full joint with no visible product path or open gap. | Hardened gasket, uneven clamp pressure, warped cover, or excessive internal pressure. | Replace seals, adjust clamps, repair or replace warped panels, and inspect connected air-handling equipment. | Run the sifter and inspect all joints for fresh flour deposits after the test. |
| Screen breaks repeatedly after replacement | Internal clearances, screen support bars, clamps, and foreign objects | Inspect contact marks, measure the gap between moving and stationary parts, and check for loose bolts or metal fragments. | Clearance must meet the equipment specification and remain uniform through a complete shaft rotation. | Screen rubbing against a support, displaced internal part, excessive shaft movement, or trapped foreign material. | Restore specified clearance, secure internal parts, replace damaged supports, and remove foreign material. | Rotate the assembly by hand after lockout, then perform a low-load trial before full production. |
| Motor overload or unexpected current increase | Drive train, bearings, product load, screen blockage, and rotor clearance | Check motor current on all phases, turn the shaft manually when isolated, and inspect for rubbing or excessive product accumulation. | Current should remain below the motor nameplate and protection setting under normal load, with balanced phases. | Blocked screen, overloaded feed, seized bearing, rubbing internal assembly, or electrical supply imbalance. | Clear the blockage, reduce feed to the rated capacity, repair mechanical defects, and investigate electrical imbalance. | Verify starting current, running current, and phase balance during an ordinary production load. |
| Sifter runs but produces little or no screening action | Motor rotation, drive coupling, eccentric weights, shaft key, and internal motion | Confirm rotation direction, inspect the coupling and key, and compare the drive setting with the approved maintenance record. | Rotation direction, drive setting, and shaft movement must match the equipment operating specification. | Reversed motor rotation, sheared key, loose coupling, or displaced eccentric weight. | Correct motor wiring if permitted, replace the key, secure the coupling, and restore the approved drive setting. | Verify direction and motion first without product, then confirm separation using a controlled flour feed. |
A failed flour sifter often shows symptoms before stopping completely. Check the feed hopper, inlet chute, and screen surface after isolating the power supply. Flour should enter steadily, not arrive in heavy pulses. Uneven loading can overload one section of the mesh and reduce separation quality. A small sample taken before and after screening reveals more than appearance alone. Record throughput, residue weight, and operating time.
Vibration needs measured observation. Inspect the motor mount, springs, fasteners, and eccentric weights for looseness or damage. Listen for rattling, then compare the machine’s movement with its normal operating pattern. Excessive vibration may indicate imbalance, worn bearings, or an uneven frame. Weak vibration can result from incorrect settings or material buildup. Keep hands clear during testing. Use calibrated instruments when possible, because visual judgment can be misleading.
Sifting performance also depends on flour condition. High moisture, compacted powder, or foreign lumps may blind the mesh. Clean the screen using an approved method, then repeat the same material-flow test. I have sometimes blamed vibration too quickly, while the real problem was poor feeding. That mistake is easy to make. If results remain unstable, check bearing temperature, screen tension, and airflow around the discharge. Compare findings with maintenance records, not memory. Small variations matter.
2026 How to Troubleshoot a Mechanical Flour Sifter Failure?
A failed flour sifter often shows clear physical clues. The motor may hum, the screen may vibrate unevenly, or flour may spill around the housing. Stop the machine before opening any guard. Check the power supply, belt tension, bearings, and screen clamps. A blocked mesh can overload the drive and reduce separation efficiency. Inspect for hardened flour at the screen edges. It behaves like a hidden wedge.
Repair work should follow the manufacturer’s service instructions and documented food-hygiene procedures. Replace damaged screens instead of stretching them back into shape. Lubricate approved bearings at the correct interval, but avoid excess grease near product zones. The U.S. Department of Energy’s Operations & Maintenance Best Practices Guide reports that preventive maintenance can reduce costs by 12–18% compared with reactive maintenance. That figure is useful, but real savings depend on inspection quality and operator discipline. I have seen maintenance plans fail because nobody recorded small vibration changes.
Tips: Clean the screen after each shift. Measure vibration weekly. Check fasteners monthly. Keep spare screens sealed and dry. Record motor temperature, noise, and repair dates. Do not ignore a minor rattle. It may become a cracked support or loose clamp. Review the schedule after every failure; some intervals look efficient on paper but are too long for dusty, high-volume production.
Start at the power source, not the screen. Confirm the disconnect is on. Inspect the plug, cable, and control panel for heat marks or loose terminals. A humming motor may still receive insufficient power. Have a qualified technician test voltage with an approved meter.
Isolate the machine before opening guards or touching components. Examine belts for glazing, cracks, and slackness. Check couplings, bearings, eccentric weights, and shaft alignment. If permitted, rotate the shaft manually. Rough movement suggests contamination, bearing damage, or seizure.
Check guard switches, emergency stops, lid sensors, and overload protection. Follow the service instructions. Never bypass an interlock. The sifter may start unexpectedly. Serious injury can result.
Find the cause before resetting it. Possible causes include excessive load, blocked mesh, poor lubrication, or mechanical resistance. A no-load test is only a clue. Test again with a controlled flour charge and watch vibration, noise, and throughput.
Inspect the mesh under bright light. Look for torn areas, stretched wire, and packed flour openings. Measure the opening against the equipment specification. Appearance can mislead you. Check screen tension before replacing it.
Look for dents and uneven seating. Even a small gap can let flour bypass the screening surface. Confirm fasteners are tight. Check seals and internal clearances. A replacement screen may not solve the real problem.
Rotate the shaft by hand and listen for roughness. Check housing temperature, grease condition, and visible dust entry. A quiet bearing can still fail soon afterward. I once blamed the screen and missed coupling misalignment.
Measure shaft runout and internal clearance with calibrated instruments. Record vibration after cleaning. Compare readings after several production cycles. Excess clearance can increase vibration. Tight clearance can create heat. Write measured values, not merely “passed.”
This guide explains how to troubleshoot a mechanical flour sifter failure by starting with the symptoms, such as reduced output, uneven sifting, unusual noise, excessive vibration, or sudden shutdowns. It outlines a practical inspection process for checking the power supply, drive components, belts, couplings, switches, and safety mechanisms. Understanding these early warning signs can help identify whether the issue is electrical, mechanical, or related to material handling.
The guide also covers the inspection of screens, sieves, bearings, seals, and internal clearances for blockage, wear, looseness, or misalignment. It explains how to test material flow, vibration patterns, and sifting performance after adjustments or repairs. Finally, it presents general repair and preventive maintenance procedures, including cleaning, lubrication, tightening fasteners, replacing worn parts, and scheduling regular inspections. These steps can improve reliability, reduce downtime, and help maintain consistent flour quality during operation.

Jiujie Machine