Automated flour mixers are designed to deliver consistent blending, yet uneven results still appear in busy production rooms. A pale streak near the vessel wall, a dense patch beneath the blades, or dry flour trapped around the lid can reveal the problem. These details matter because poor blending affects dough texture, hydration, product weight, and batch reliability.
The question “what causes uneven blending in automated flour mixers” rarely has one simple answer. This guide examines ten practical causes, including incorrect ingredient loading, moisture variation, unsuitable mixing speed, overfilled vessels, and worn paddles. It also considers blade clearance, mixer geometry, airflow, calibration errors, and cleaning residue. Each factor can create a different pattern inside the batch. Sometimes, several small faults work together.
Operators often notice the symptom before identifying the source. That experience is valuable, but visual checks alone can mislead. A mixer may look clean while hidden flour remains beneath a seal. A programmed cycle may seem correct while actual speed drops under load. Careful testing is needed. Comparing samples from the top, center, and bottom can expose uneven distribution. Reviewing maintenance records can reveal gradual equipment decline.
The discussion combines production experience with basic mixing principles and practical inspection methods. It does not assume every mixer behaves identically. That would be unrealistic. Instead, it encourages measured checks, documented adjustments, and repeat testing. Reliable improvement usually begins with small observations, not dramatic changes.
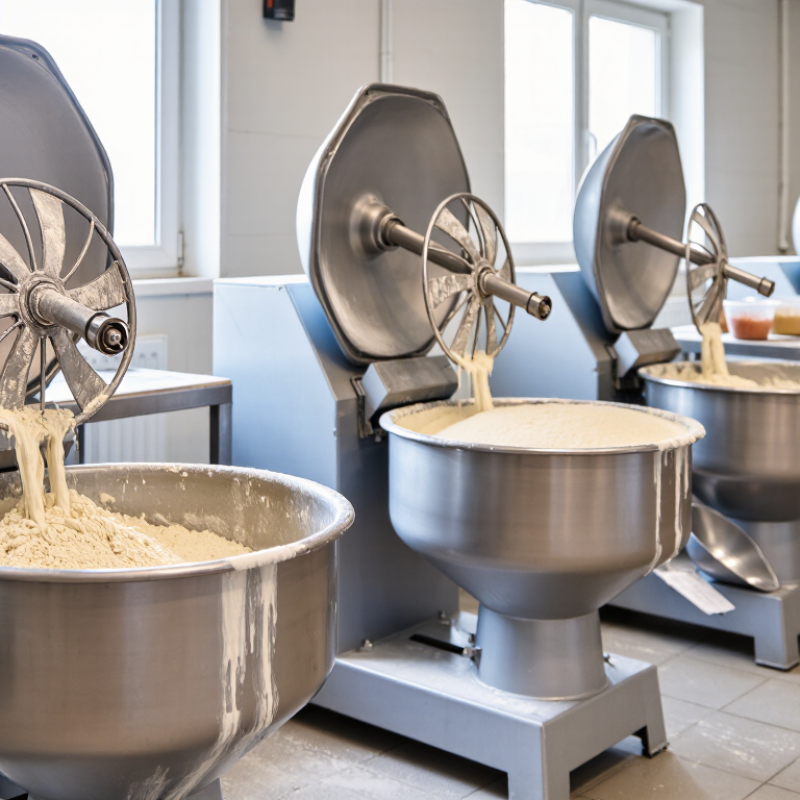
What Uneven Mixing Means in Automated Flour Mixers
Top 10 Causes of Uneven Mixing in Automated Flour Mixers?
What Uneven Mixing Means in Automated Flour Mixers
Uneven mixing means flour, water, fat, salt, or additives are not distributed consistently. One sample may look dry, while another feels heavy or damp. This variation can change dough texture, product weight, and baking performance. In production, the problem often appears as pale streaks, wet pockets, or dry powder near the mixer wall.
Common causes include overloading, underfilling, incorrect mixing speed, and poor ingredient loading order. Worn paddles can create hidden dead zones. Moisture may cling to the vessel surface, especially after cleaning. Different particle sizes also separate during fast rotation. A loose coupling or unstable motor can make the pattern worse. These details are easy to overlook.
Operators should inspect samples from the top, center, and bottom of each batch. A simple moisture check can reveal differences that eyesight misses. Record loading times, batch weight, speed, and mixing duration. Compare these records with paddle wear and discharge behavior. In my experience, extending the mixing time is not always the answer. It may increase heat and damage dough development. Even experienced teams can misjudge a mixer that sounds normal. Careful sampling remains more reliable than assumptions.
How Mixer Design and Capacity Affect Flour Uniformity
Top 10 Causes of Uneven Mixing in Automated Flour Mixers
How Mixer Design and Capacity Affect Flour Uniformity
Automated flour mixers rarely produce uniform results by speed alone. Their vessel shape, blade movement, and working capacity matter just as much. An oversized bowl can leave flour rolling beneath the mixing path. An overloaded chamber may form dense pockets near the walls. An underfilled chamber can prevent the blades from engaging enough material. These capacity errors often appear as pale streaks, compact lumps, or inconsistent dough texture.
Mixer geometry creates other problems.
Poor paddle clearance may leave dead zones around the bottom or corners. A narrow discharge opening can encourage segregation during emptying. Excessive blade speed may push heavier particles outward instead of blending them. Slow movement can also fail when the flour contains moisture. Loading order matters too. Adding fine flour before heavier ingredients may create a settled layer. Different particle sizes can separate during transfer. Temperature changes may increase sticking.
In production checks, I inspect samples from the top, center, and discharge point. This simple method often reveals patterns that one sample misses. We once blamed the mixing time, but the real issue was an oversized batch. The machine was working, technically. The result was still uneven. Capacity should match the mixer’s effective working volume, not its advertised maximum. Small design compromises matter. A few millimeters of clearance can change cleanability and uniformity. Test batches should record fill weight, mixing speed, ingredient order, and discharge behavior. Data exposes assumptions. Sometimes, the operator’s routine needs adjustment too.
How Ingredient Properties and Loading Order Create Uneven Mixing
Top 10 Causes of Uneven Mixing in Automated Flour Mixers?
Ingredient properties and loading order often create uneven flour mixing. The ten common causes include moisture variation, particle-size differences, bulk-density gaps, fat content, electrostatic charge, hygroscopic powders, overloading, underloading, poor loading sequence, and insufficient mixing time.
Codex Alimentarius CXS 152-1985 sets wheat-flour moisture at a maximum of 15.5%. Even a smaller shift can change flow and adhesion. Salt and fine sugar may sink, while bran or protein particles can remain near the surface. Fat-coated ingredients may form small islands instead of dispersing.
Loading order matters more than many operators expect. Heavy flour added first can compress against the mixer floor. Light powders added later may float through the moving air. Liquid additions can create wet pockets when they meet dry flour too quickly.
A 2023 review in Powder Technology associates moisture, cohesion, and particle-size distribution with poorer powder flow. In practice, our first diagnosis is often wrong. We may blame the mixer when the real issue is a 10-kilogram density difference between batches. Dead zones also appear near the wall, discharge gate, and shaft ends.
Tips:
Sieve dense powders before loading. Add small-dose ingredients with a flour carrier. Introduce liquids slowly across the moving bed. Record moisture, temperature, batch weight, and loading time. Check three samples: top, center, and discharge. Do not trust one sample. A simple dye test can reveal hidden streaks, although it cannot replace laboratory testing. Review the sequence after every formula change.
How Operating Conditions and Equipment Wear Cause Mixing Problems
Top 10 Causes of Uneven Mixing in Automated Flour Mixers
Uneven mixing rarely begins with the flour. It often starts with operating conditions that quietly shift during production. An overfilled mixer can leave a dry pocket beneath the shaft. An underfilled bowl may not create enough material turnover. Low speed reduces circulation, while excessive speed can create a rotating mass. Moisture is equally important. The Codex Standard for Wheat Flour, CXS 152-1985, sets a maximum moisture level of 15.5%. Small moisture differences can change flow, adhesion, and mixing time. That specification is not a mixing guarantee.
Equipment wear creates another hidden problem. Worn paddles, enlarged clearances, and damaged scrapers allow flour to remain along the wall. A loose shaft can also produce uneven movement and vibration. I have seen teams adjust speed for hours when a worn contact surface was the real cause. We sometimes blame the recipe too quickly. The FAO’s Food Outlook reports regularly identify moisture, storage, and handling as major cereal-quality variables. Those factors deserve checks before changing formulas. Temperature matters too, especially when fats soften and coat flour particles.
Tips:
Check fill level, speed, moisture, and discharge time for every batch. Inspect paddle edges and wall clearances weekly. Use a simple sampling pattern from the top, center, and bottom. Record mixer noise and vibration. Small changes become useful evidence. One test batch is rarely enough.
How to Diagnose and Prevent Uneven Flour Mixing
Top 10 Causes of Uneven Mixing in Automated Flour Mixers
How to Diagnose and Prevent Uneven Flour Mixing
Uneven flour mixing often begins with poor loading, incorrect batch size, or inconsistent ingredient moisture. Particle size differences can create separation during transfer. Worn paddles may also leave quiet pockets near the mixer walls. Overfilling reduces movement, while underfilling prevents proper contact. Speed matters, but it is not the only answer. A faster cycle can increase dust, heat, and separation.
Diagnosis should start with samples from the top, center, and bottom of the batch. Test samples taken at different mixing times. Compare their color, moisture, and ingredient distribution. Check the mixer after discharge. Residue in corners can reveal dead zones. Inspect paddle clearance, seals, and internal surfaces regularly. One practical mistake is trusting the timer too much. A fixed cycle may fail when flour temperature or moisture changes. Record each batch condition and adjust carefully.
Tips: Load lighter ingredients gradually. Keep batch size within the mixer’s working range. Avoid adding wet ingredients in one concentrated spot. Check paddle wear every maintenance period. Use a simple, food-safe visual tracer during trials. Clean hidden corners, not only visible surfaces. Small tests help. Reliable results come from repeated sampling, not assumptions.
Conclusion
Uneven mixing in automated flour mixers occurs when ingredients are not distributed consistently throughout the batch, creating variations in moisture, texture, color, or baking performance. This article explains what causes uneven blending in automated flour mixers by examining mixer design, capacity, and the relationship between vessel size, paddle shape, and batch volume. It also explores how flour particle size, ingredient density, moisture levels, and loading order can prevent materials from combining evenly.
Operating conditions are equally important. Incorrect mixing speed, insufficient mixing time, overloading, poor temperature control, and inconsistent ingredient feeding may all contribute to nonuniform results. Equipment wear, damaged mixing tools, buildup inside the vessel, and inaccurate sensors can further reduce performance. The article concludes with practical methods for diagnosing uneven flour mixing, including checking batch consistency, inspecting equipment, reviewing process settings, and establishing preventive maintenance and loading procedures.

 Jiujie Machine